Blobs are unstructured data that can be of any type or size. Azure Storage supports uploading three types of blobs: block blobs, page blobs, and append blobs. During the upload, you can specify the type of the blob.
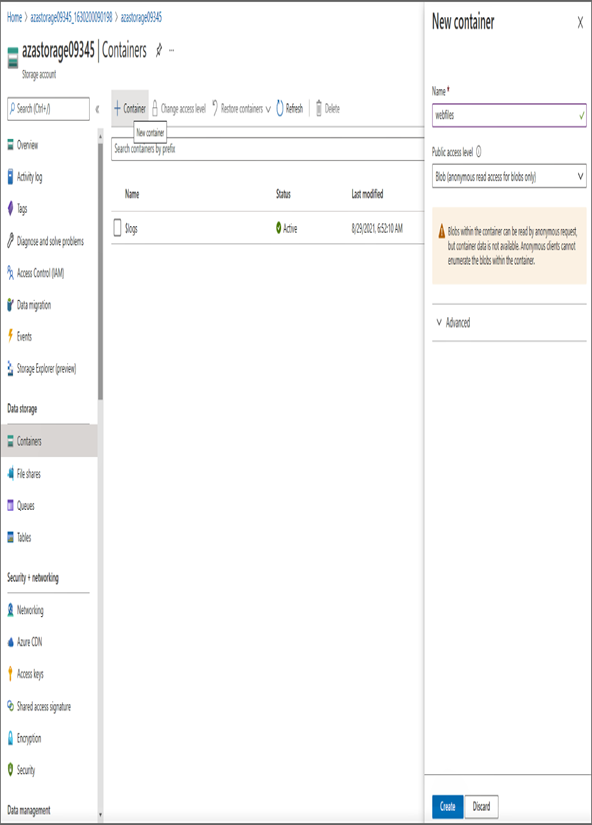
Figure 6.8 shows how the file can be uploaded to the container that is under the storage account.
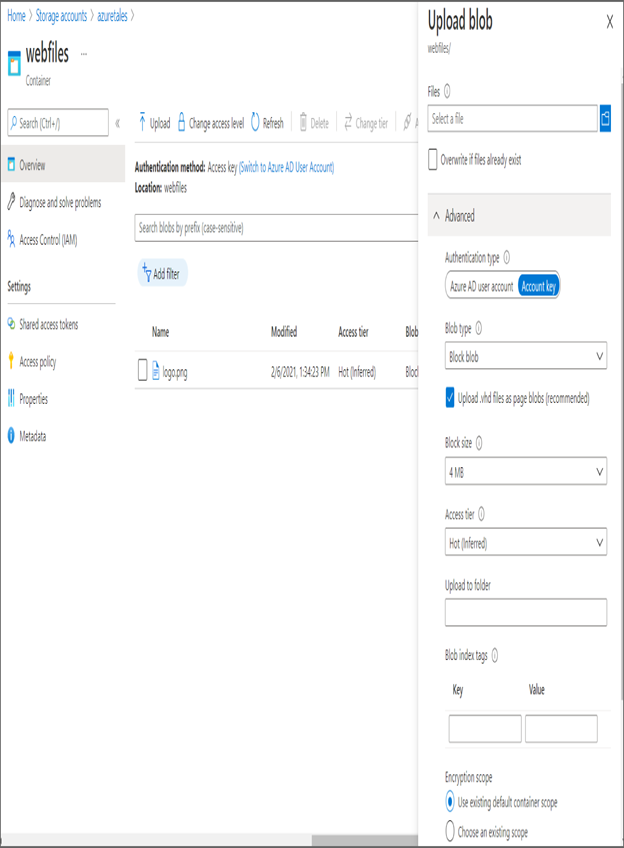
FIGURE 6.8 Uploading blobs
Let’s understand these types of blobs:
Block Blobs (Default) This is the default blob type. It is ideal for storing text and binary data such as images, videos, and files in Azure storage.
Append Blobs Optimized for append operations, this is ideal for logging scenarios where the data is constantly appended to the storage.
Page Blobs This is ideal for frequent read/write operations and can be up to 8 TB in size. Azure stores virtual machine OS disks and data disks in page blob format.
In Figure 6.8, you can see that you have an option to choose the blob type during the upload process. However, you cannot the change the type after the object is uploaded to the storage. Exercise 6.1 will teach you how to create the storage account and upload files to the storage.
EXERCISE 6.1
Uploading Blobs
- Sign in to the Azure portal and search for Storage Accounts.
- Click the Create button to take you through the creation process.
- In the Basics section, fill in these inputs:
- Subscription: Select your Azure subscription.
- Resource Group: Create a new resource group or select an existing resource group.
- Storage account name: Give a unique name to the storage account. If the name is already taken, Azure will warn you and will not let you create the storage account. You can use lowercase characters and numbers. The name must be between 3 and 24 characters.
- Region: Choose a region.
- Performance: Select Standard or Premium tier. The default selection is Standard.
- Redundancy: Choose the redundancy per your requirements. The default choice is RA-GRS. For testing, it’s better to select LRS to reduce costs.
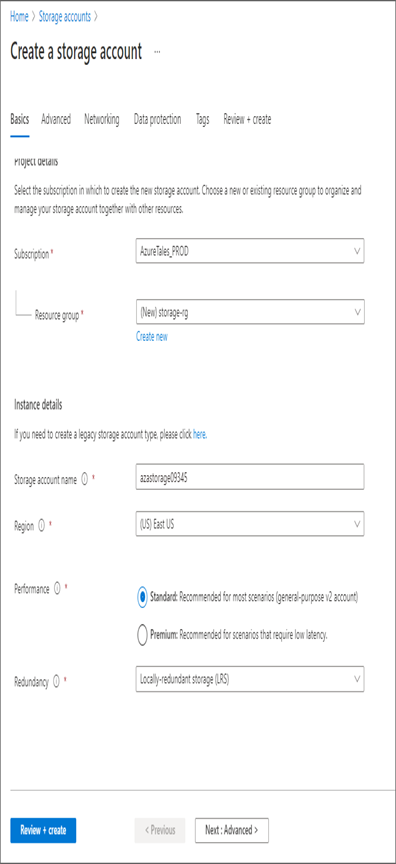
- After completing the Basic tab, click Next: Advanced, and this will take us to the Advanced tab.
- On the Advanced tab, none of the options needs to be changed, unless there is a need for that. One option to note here is Access Tier; you change this to Cool from Hot (default option) if needed.
- Click Next: Networking. On the Networking blade, you can see the option to configure the connectivity method. By default, this will be set to Public Endpoint (All Networks); that means all connections from all networks are allowed. You have two more options: Private Endpoint and Public Endpoint (Selected Networks).
- Click Next: Data Protection. On the Data Protection blade, you can control the soft delete configuration and the retention. No changes are required in this tab for this exercise.
- Click Review + Create and wait for the validation to complete.
- Once the resource is created, navigate to Storage Accounts, and click the storage account you created. Clicking the storage account will take you to the Overview blade.
- Click Containers under Data Storage.
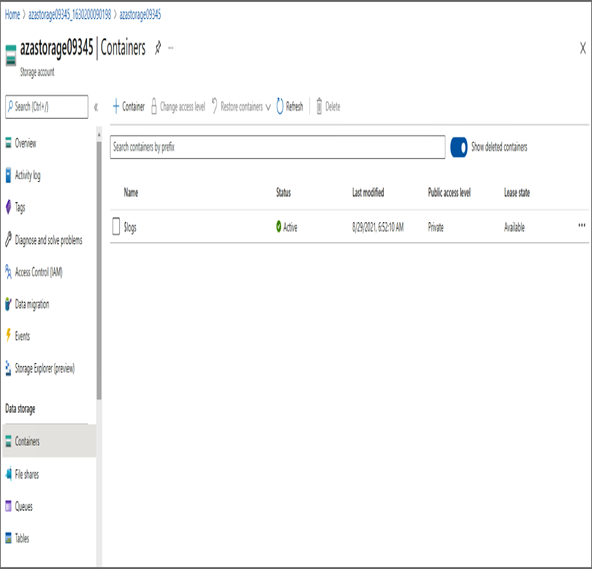
11. Inside the Containers blade, click + Container to add a new container. You need to give a name for the container and public access level. You will set the public access level to Blobs. Click to create the container.
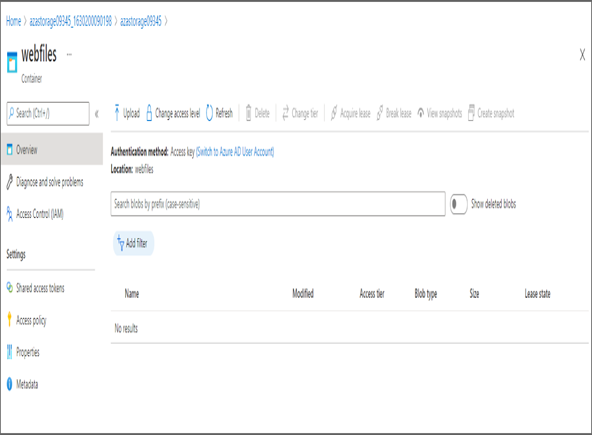
12. Once the container is created, click the container name, which will take you to the overview of the container. On the Overview blade, you will be able to see the Upload button.
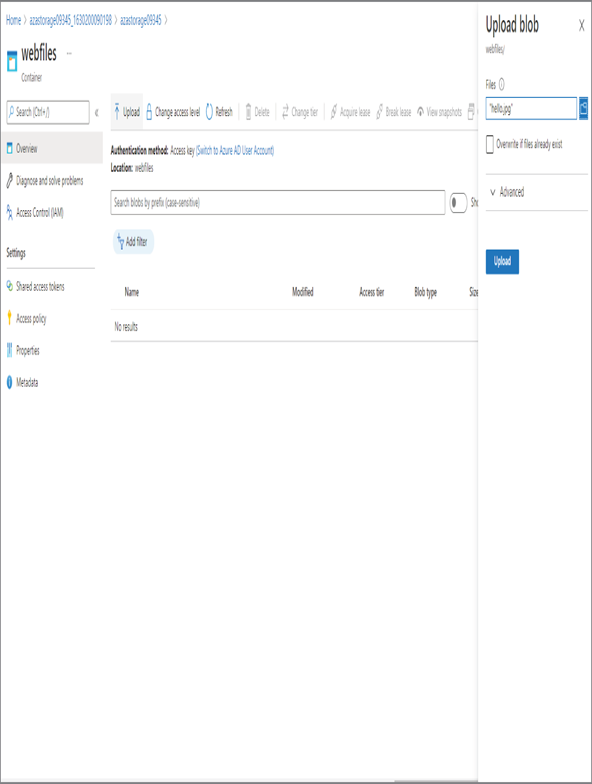
13. Click the folder icon and upload an image from your local computer. Once you see the selected file name under Files, click the Upload button.
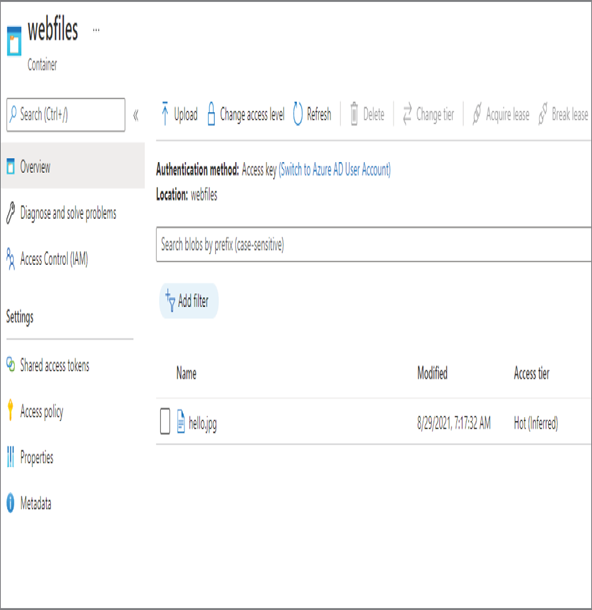
14. The uploaded blob will be visible in the container (refer to the first graphic shown here), and it will expose a link to you (refer to the second graphic shown here).

15. If you inspect the URL, it will contain the storage account name, container name, and blob name. In this case, the link is generated based on the inputs given, and in your environment the link will be based on the inputs you give. Paste the URL in a browser, and you will be able to see the image you uploaded.

You can keep the storage account from the previous exercise as you will need it in Exercise 6.2.
Additionally, you have other tools to upload files to the blob. These include AzCopy, Azure Storage Data Movement library, Azure Data Factory, Blobfuse, Azure Data Box Disk, Azure Storage Explorer, and the Azure Import/Export service. Out of these tools, we will cover Storage Explorer, AzCopy, and the Import/Export service in the “Managing Storage” section.
In the previous exercise, the blob is publicly available from any client anywhere in the world over HTTPS connection. This is possible because you have set the access policy as Blob, which means anonymous access to the object is allowed. In some cases, you might need to secure the data in your storage and grant access only to a set of users. Before we discuss Azure Files, let’s take a step back and explore the storage security options.